Building Fully Native iOS Apps with Expo EAS
 Patryk Mleczek•Oct 2, 2025•12 min read
Expo Application Services (EAS) is a set of powerful and highly customizable tools that allow you to streamline building your React Native apps both on EAS cloud and locally. In this tutorial we’ll see how we can go beyond those common use cases and configure EAS to build a fully-native iOS app.
Step 1: Project setup
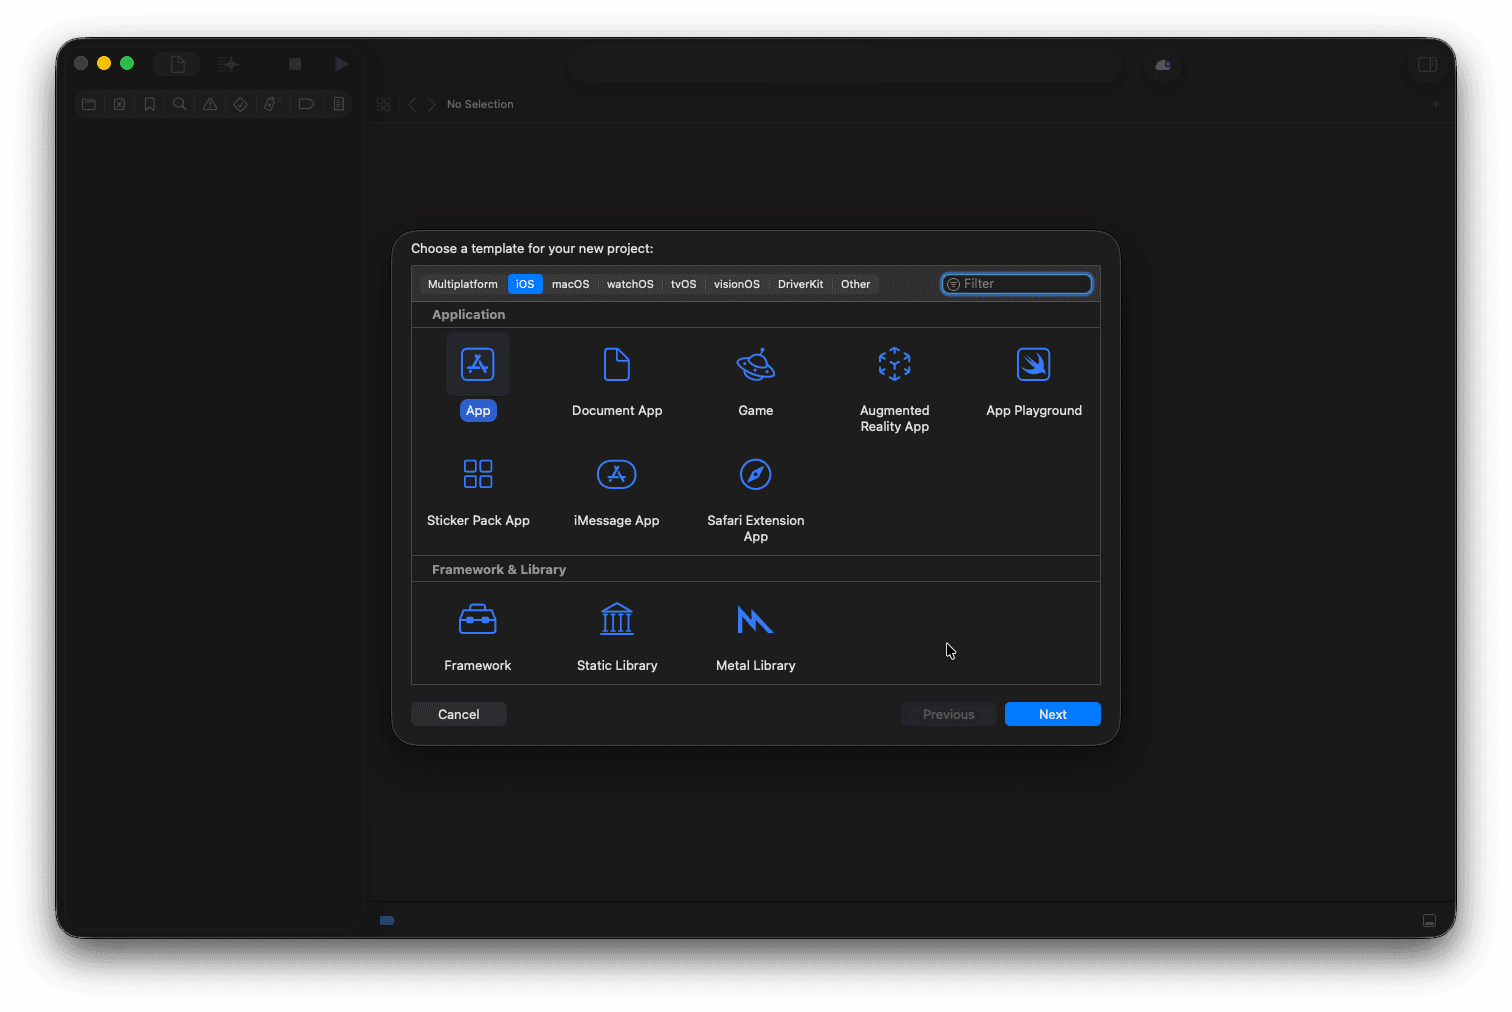
Let’s start with creating a simple iOS application. Create a new project using XCode and select iOS as the platform and the Application > App template:
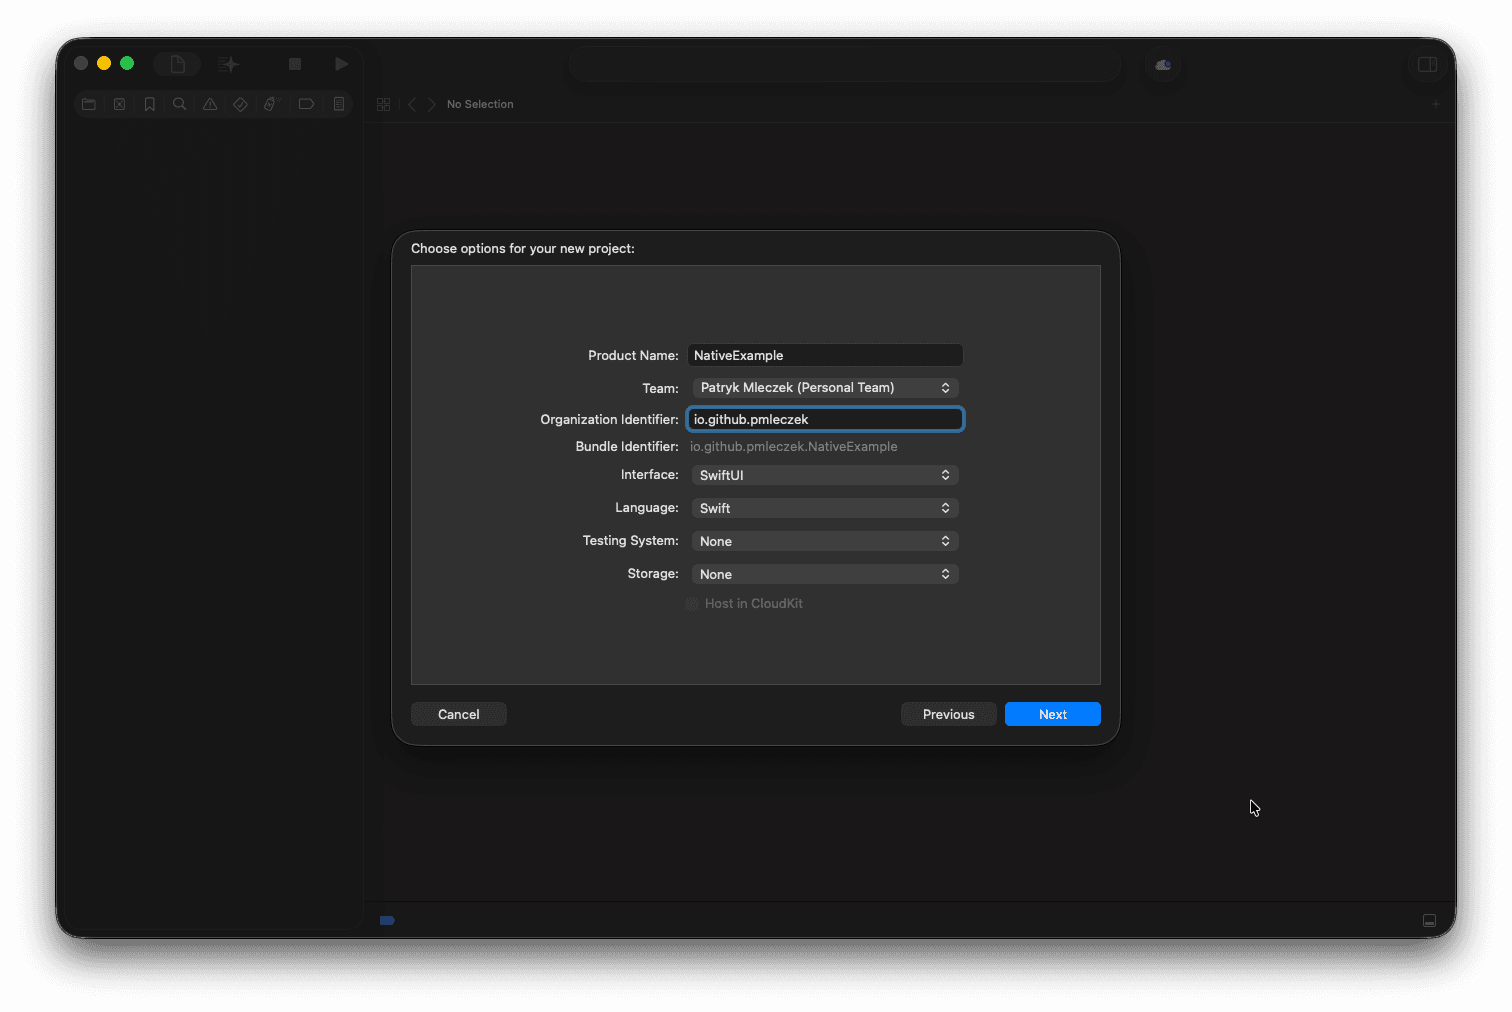
Next, input a name and an organization identifier for your app. To keep the example simple let’s choose SwiftUI as the interface and let’s not include any testing system or storage:
Select the location for your project and whether you want to include a Git repository. The application should be ready.
Step 2: Extending the application
Now, as our app is ready, we can slightly modify it to make it a bit more interesting. First, let’s create a new view for the home screen:
// HomeView.swift
import SwiftUI
struct HomeView: View {
var body: some View {
Text("🏡")
.font(.system(size: 100))
Text("Home")
.font(.system(size: 32, weight: .bold))
}
}
#Preview {
HomeView()
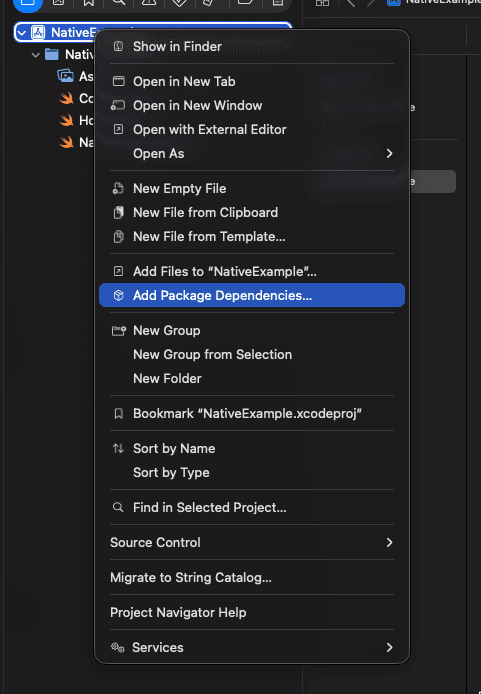
}For the second screen, let’s add some external dependencies to our project and render something a bit more engaging, like an SVG image. Right-click the project in the XCode navigator and select Add Package Dependencies…:
To render the SVG image, we’ll use the SVGView library created by exyte. In the dependency menu, enter the GitHub repository link in the box at the top right, then click Add Package to include it in your project.
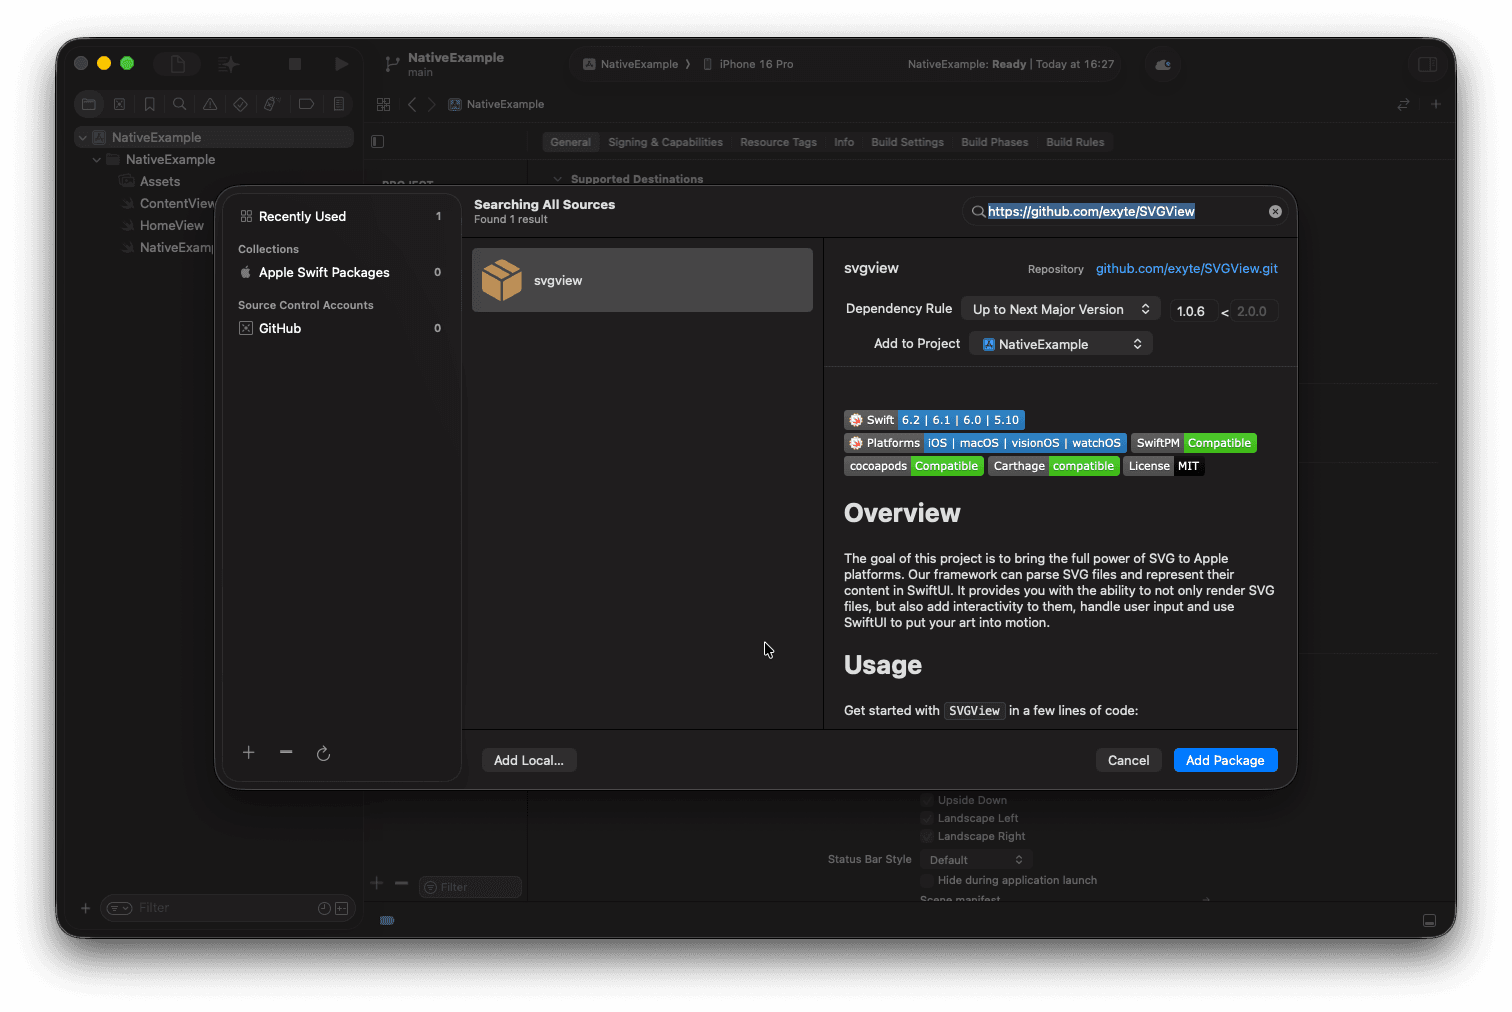
When prompted with another modal, ensure that it’s added to the target and click Add Package once again to confirm:

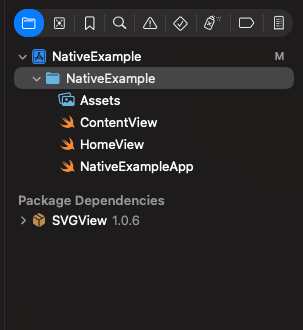
The library should be visible under Package Dependencies section in the XCode project navigator:
Now as we have our dependency in place, we can add the second screen rendering an SVG image:
// SVGScreenView.swift
import SwiftUI
import SVGView

struct SVGScreenView: View {
  var body: some View {
    if let url = URL(
      string: "https://upload.wikimedia.org/wikipedia/commons/f/f2/Yellow_square_happy_smiley.svg"
    ) {
      SVGView(contentsOf: url)
        .frame(width: 320, height: 180)
        .padding()
      Text("SVG")
        .font(.system(size: 32, weight: .bold))
    } else {
      Text("❌ Failed to load SVG")
        .font(.system(size: 32, weight: .bold))
    }
  }
}

#Preview {
  SVGScreenView()
}
Next, we can add both screens to the app using a tab view:
// ContentView.swift
struct ContentView: View {
  var body: some View {
    TabView {
      Tab("Home", systemImage: "house.fill") {
        HomeView()
      }

      Tab("SVG", systemImage: "pencil.and.outline") {
        SVGScreenView()
      }
    }
  }
}
We can build our app for simulator/physical device or use built-in preview of XCode to see what it looks like with the new screens:
Step 3: Configuring EAS in the project
To be able to use EAS, you’ll need to authenticate with an Expo account. You can create one at: https://expo.dev/.
Once your account is up and running, we can move on to setting up the EAS CLI. First, ensure you have the latest version of eas-cli installed:
npm install -g eas-cliThen, sign in using your Expo account:
eas loginBefore we set up EAS using the CLI we have to add a minimal package.json file in the root of our project:
{
  "name": "native-example",
  "verison": "1.0.0",
  "private": true
}
Next, let’s install two required dependencies: expo and expo-dev-client (required for creating development builds):
npm i expo expo-dev-clientNow that the minimal project configuration is set up, we can configure EAS.
Run the following command in the project’s root directory:
eas build:configureWhen prompted about creating an EAS project, select yes to automatically create a new project and link your application with it. As for the platforms, select iOS since our application is iOS-only:

The project should now be successfully configured to use EAS and be visible in the dashboard and projects view at https://expo.dev.
An app.json file containing the EAS project ID should be created automatically:
{
  "expo": {
    "extra": {
      "eas": {
        "projectId": "<EAS project ID>"
      }
    }
  }
}
An eas.json file with some default build settings should be created as well:
{
  "cli": {
    "version": ">= 16.19.3",
    "appVersionSource": "remote"
  },
  "build": {
    "development": {
      "developmentClient": true,
      "distribution": "internal"
    },
    "preview": {
      "distribution": "internal"
    },
    "production": {
      "autoIncrement": true
    }
  },
  "submit": {
    "production": {}
  }
}
Let’s quickly analyze the contents of the cli and the submit sections (we’ll look into the build section in more detail in the next section). EAS CLI has automatically configured two keys for CLI settings:
version— Specifies the minimal version of EAS CLI to be used with our project.appVersionSource— Whether app version should be automatically managed by EAS (remote) or taken from the source code of the project (local).
The submit section contains one key: production. It configures EAS Submit — a service which streamlines uploading. If we were to distribute our application via the stores, we could further configure this entry according to our needs. We’ll overwrite the above configurations in the next step, as we won’t be using the majority of them.
Step 4: Adding custom build configuration
Let’s start with creating a custom build configuration we’ll first test locally with eas build–local and later embed within our workflows. We’ll define a custom build configuration based on the steps used by the built-in eas/build function. You can check out the reference for this and other built-in functions at: https://docs.expo.dev/custom-builds/schema/#ios.
When using Expo in a standard React Native project — either via Continuous Native Generation or by using prebuild — the iOS directory is automatically created and managed by Expo. In our case, however, we want the root of our project — which contains the native app — to be treated as an iOS prebuilt application. The simplest approach is to symlink our Xcode project root as the iOS directory. At a high level, our build process will look like this:
- Symlink root of our iOS app as
iOSdirectory - Build the application
We’ll start by creating a custom build configuration (more information about custom builds can be found here: https://docs.expo.dev/custom-builds/get-started/) by creating a new .eas directory at the root of our project, a build subdirectory in it, and a new build configuration file build-ios.yml which will define all steps required to build our project.
Let’s start by giving our custom build workflow a meaningful name:
build:
  name: Build iOS app
The first two steps involve checking out our project files and installing the npm dependencies. We’ll skip eas/use_npm_token, since we’re not using any private repositories:
build:
  name: Build iOS app
  steps:
    - eas/checkout
    - eas/install_node_modules
Next, we need to create the symlink so that whenever EAS looks in the iOS directory, it’ll be redirected to the root of our project:
build:
  name: Build iOS app
  steps:
    - eas/checkout
    - eas/install_node_modules
    - run:
        name: Symlink ios
        command: ln -sf . ios
Then, let’s skip eas/prebuild and pod installation steps as our project already has the native code and we don’t depend on anything using Cocoapods. We’ll also skip eas/configure_eas_update, as it’s related to updating non-native pieces of the app, which we don’t have.
Now, let’s add the final three steps to generate the build configuration and build our application:
build:
  name: Build iOS app
  steps:
    - eas/checkout
    - eas/install_node_modules
    - run:
        name: Symlink ios
        command: ln -sf . ios
    - eas/resolve_build_config
    - eas/generate_gymfile_from_template:
        inputs:
          scheme: NativeExample
    - eas/run_fastlane
    - eas/find_and_upload_build_artifacts
Note that for eas/generate_gymfile_from_template, we’re passing a custom input for the scheme name. By default, EAS tries to resolve the scheme based on the application slug (the project name in the Expo dashboard with all hyphens removed).
Now that our custom build configuration is ready, we can define build profiles. Let’s start by creating a new eas.json file at the root of the application (if it doesn’t exist yet) or by overwriting the contents of the already existing one. Next, it’s time to define a build profile called development-simulator:
{
  "build": {
    "base": {
      "developmentClient": true,
      "distribution": "internal",
      "ios": {
        "config": "build-ios.yml"
      },
      "withoutCredentials": true
    },
    "development-simulator": {
      "extends": "base",
      "ios": {
        "simulator": true
      }
    }
  }
}
It’s time to analyze the structure of the build profile. The root key of each profile (base, development-simulator) defines the profile name which can be used in EAS workflows or when running eas build command. The profiles contain configuration options:
extends— Specifies which profile’s properties should be inherited. This option allows us to share common configurations between multiple profiles.developmentClient— When passedtrueindicates that build is a development build.distribution— Indicates the type of our application’s distribution. Theinternalvalue passed here means that our application will be distributed in a simpler way meant for sharing it within our team and for testing purposes.withoutCredentials— Skips prompting for Apple Developer credentials which aren’t needed for the internal distribution.
The ios sections defines iOS-specific configurations:
config— Allows us to use the custom build configuration we defined earlier by referencing its filename.simulator— When set totruethe application will be built for the simulator as the target, instead of physical devices.
Now, that our profiles are defined, we can run the build locally to ensure everything works as expected:
eas build -p ios -e development-simulator --localDuring the first build run, we may be asked about the project’s bundle identifier and encryption. For the bundle identifier, we can use the same one we entered when setting up the project:
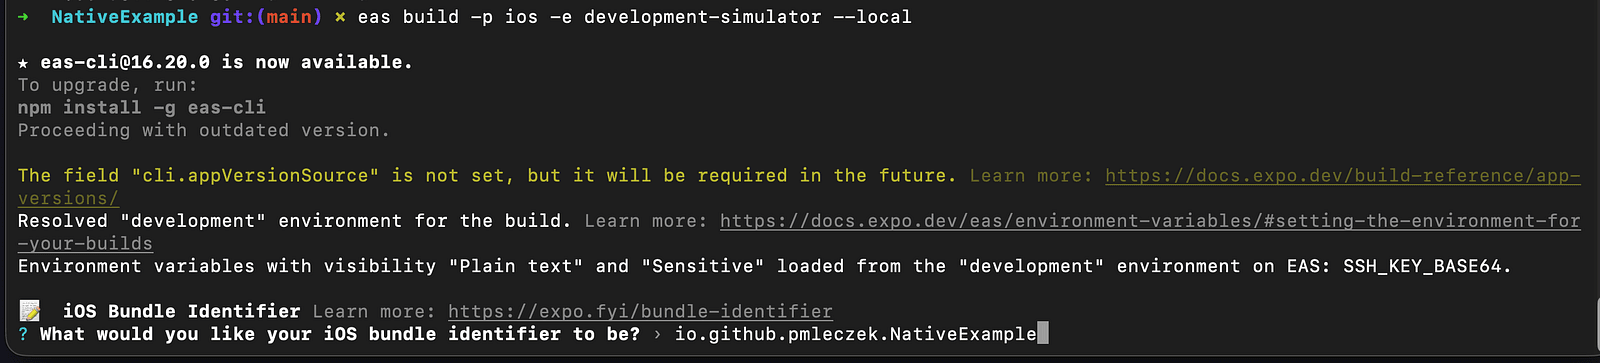
If we’re prompted about encryption, we can select yes if our project uses standard or exempt encryption. More details about encryption are available in Apple’s official documentation at: https://developer.apple.com/documentation/security/complying-with-encryption-export-regulation.

These settings will be saved in app.json and used for subsequent builds:
{
"expo": {
"extra": {
"eas": {
"projectId": "4916279a-9299-4061-a4af-8c2d466f4eca"
}
},
"ios": {
"bundleIdentifier": "io.github.pmleczek.NativeExample",
"infoPlist": {
"ITSAppUsesNonExemptEncryption": false
}
}
}
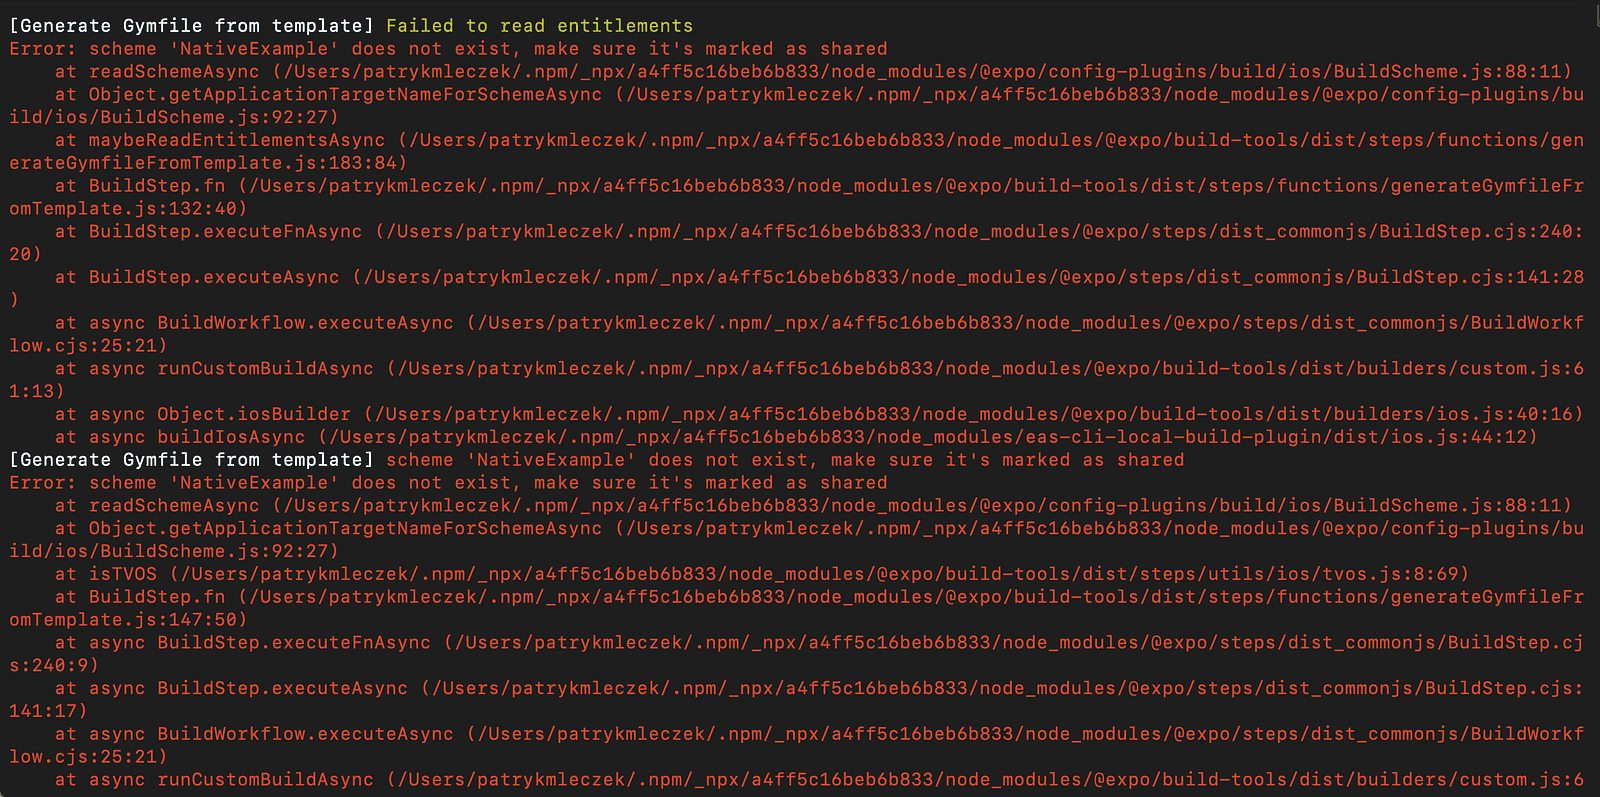
}If you encounter an error when resolving the scheme, and you’re certain that the scheme provided in the build configuration matches the one defined in Xcode:
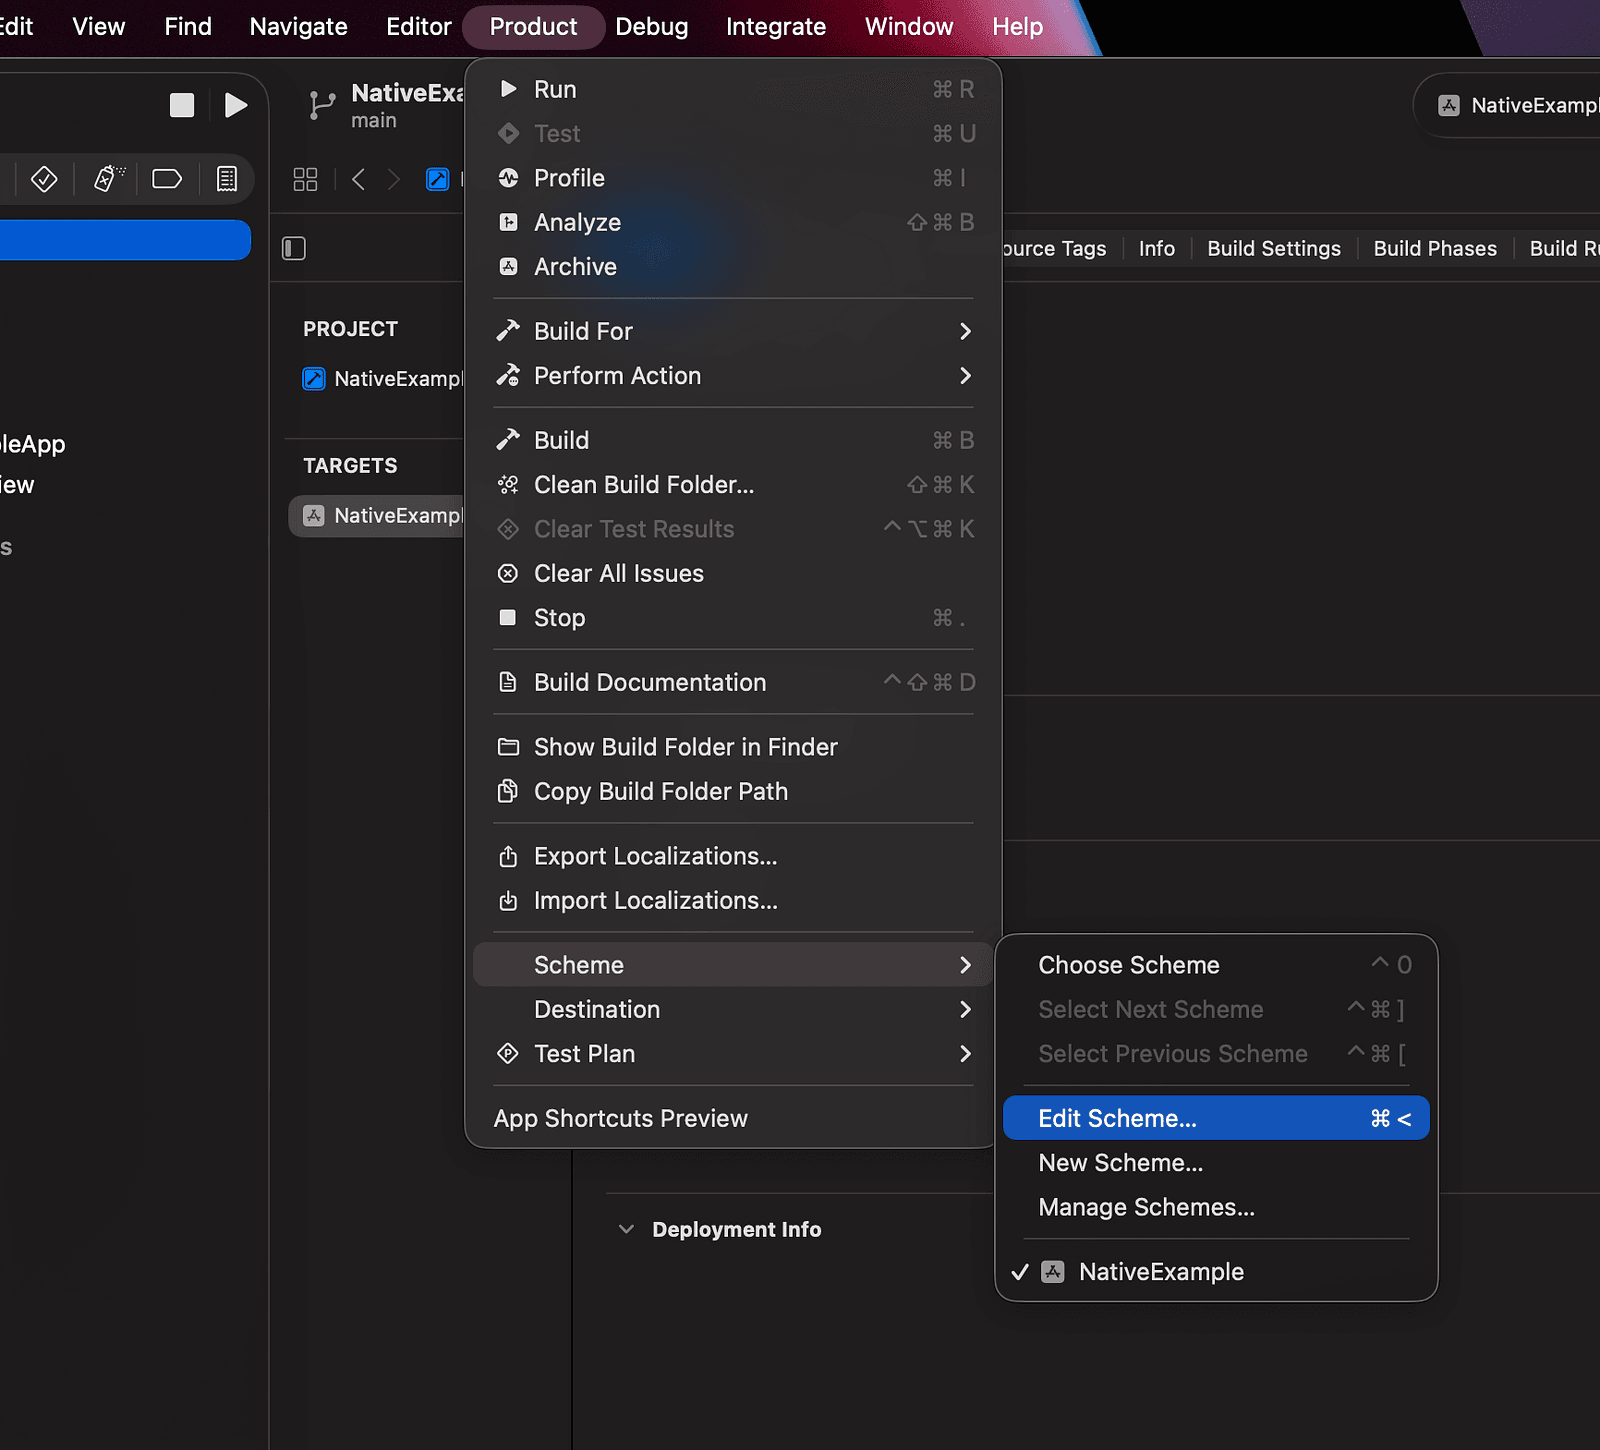
Return to XCode and select the Product > Scheme > Edit Scheme... menu item. It’ll open the scheme menu:
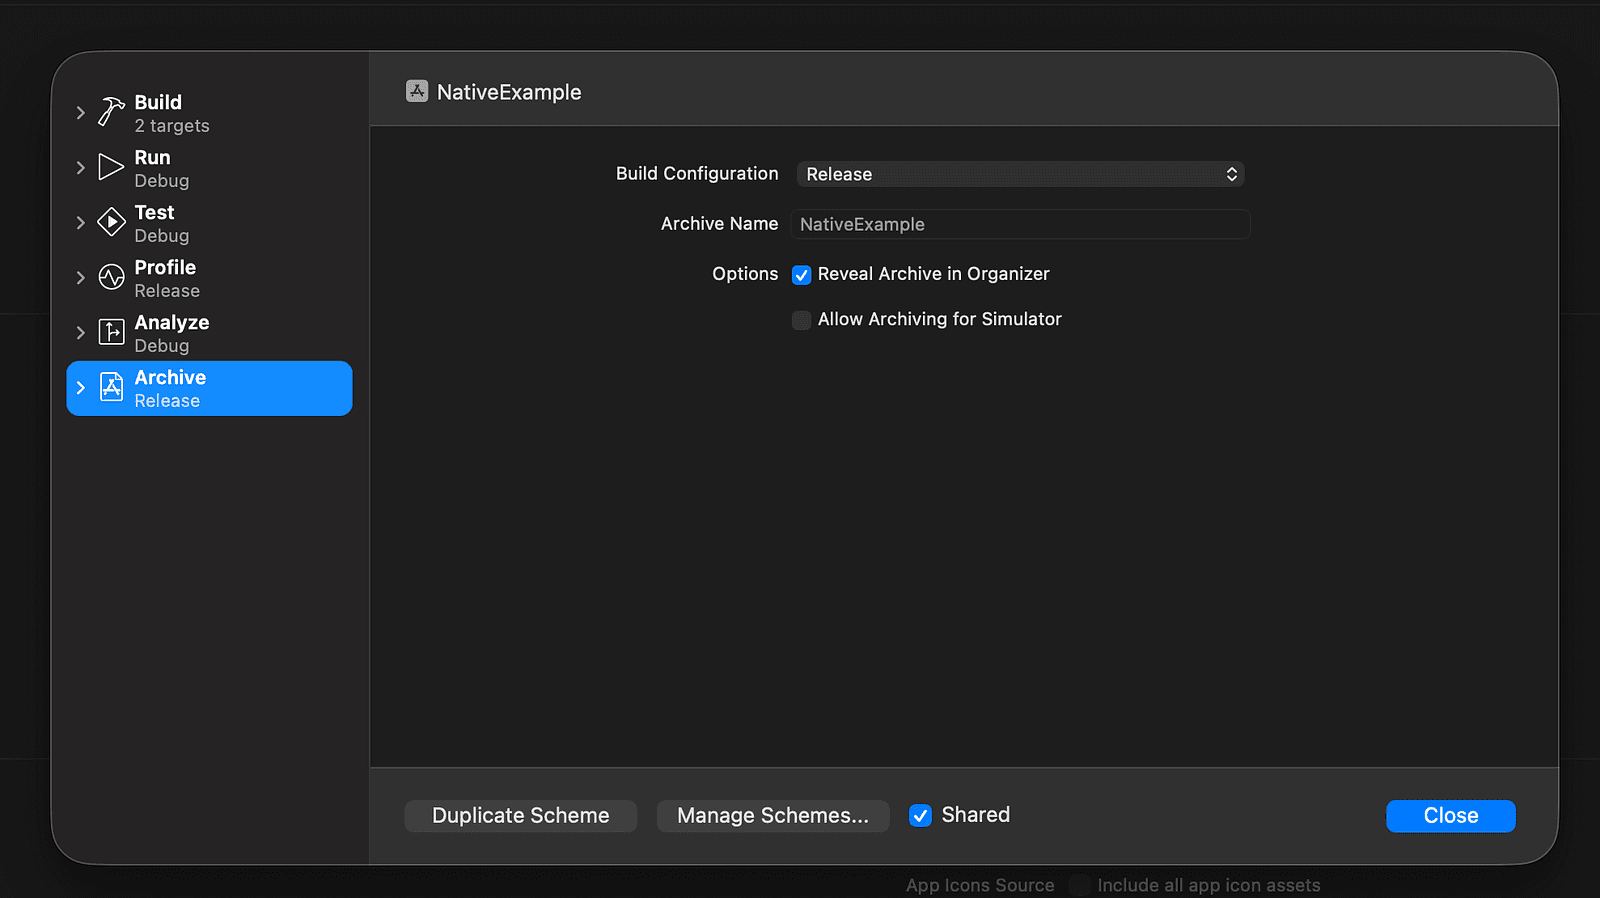
Let’s disable and re-enable the Shared property of our scheme, by toggling the checkbox at the footer of the menu twice:
Click Close and start the local build again by running:
eas build -p ios -e development-simulator --localThe build should finish successfully outputting the path of an archive containing our application:

Once we know that the build works locally, we can move on to run it on EAS cloud. Run the same command as previously but without passing the option --local:
eas build -p ios -e development-simulatorThis command will create a new build request on the EAS cloud and automatically execute it:
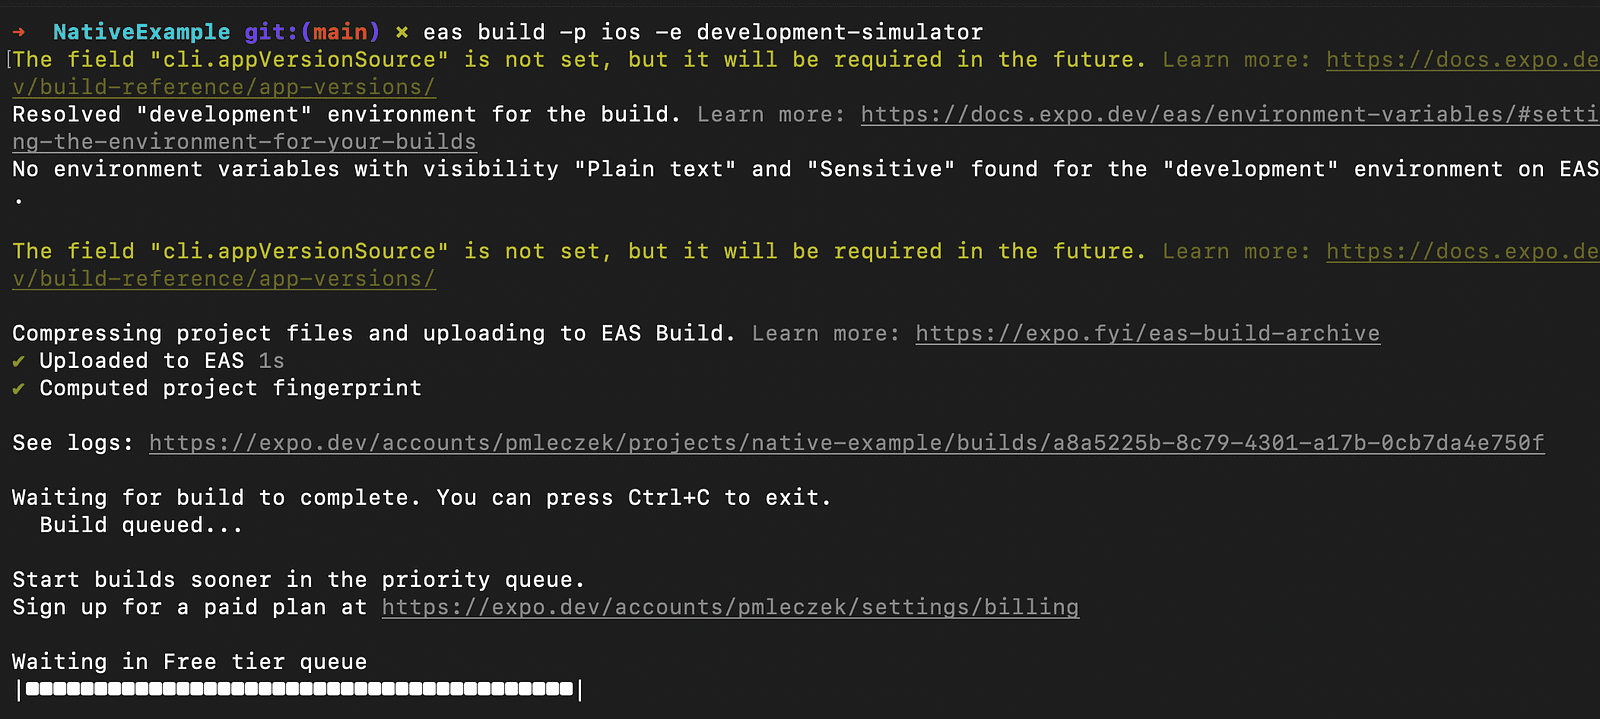
We can see the progress of the build at: https://expo.dev/accounts/<username>/projects/<project-slug>/builds.
Once the build is complete, the terminal will prompt us, provided the build process hasn’t been terminated:
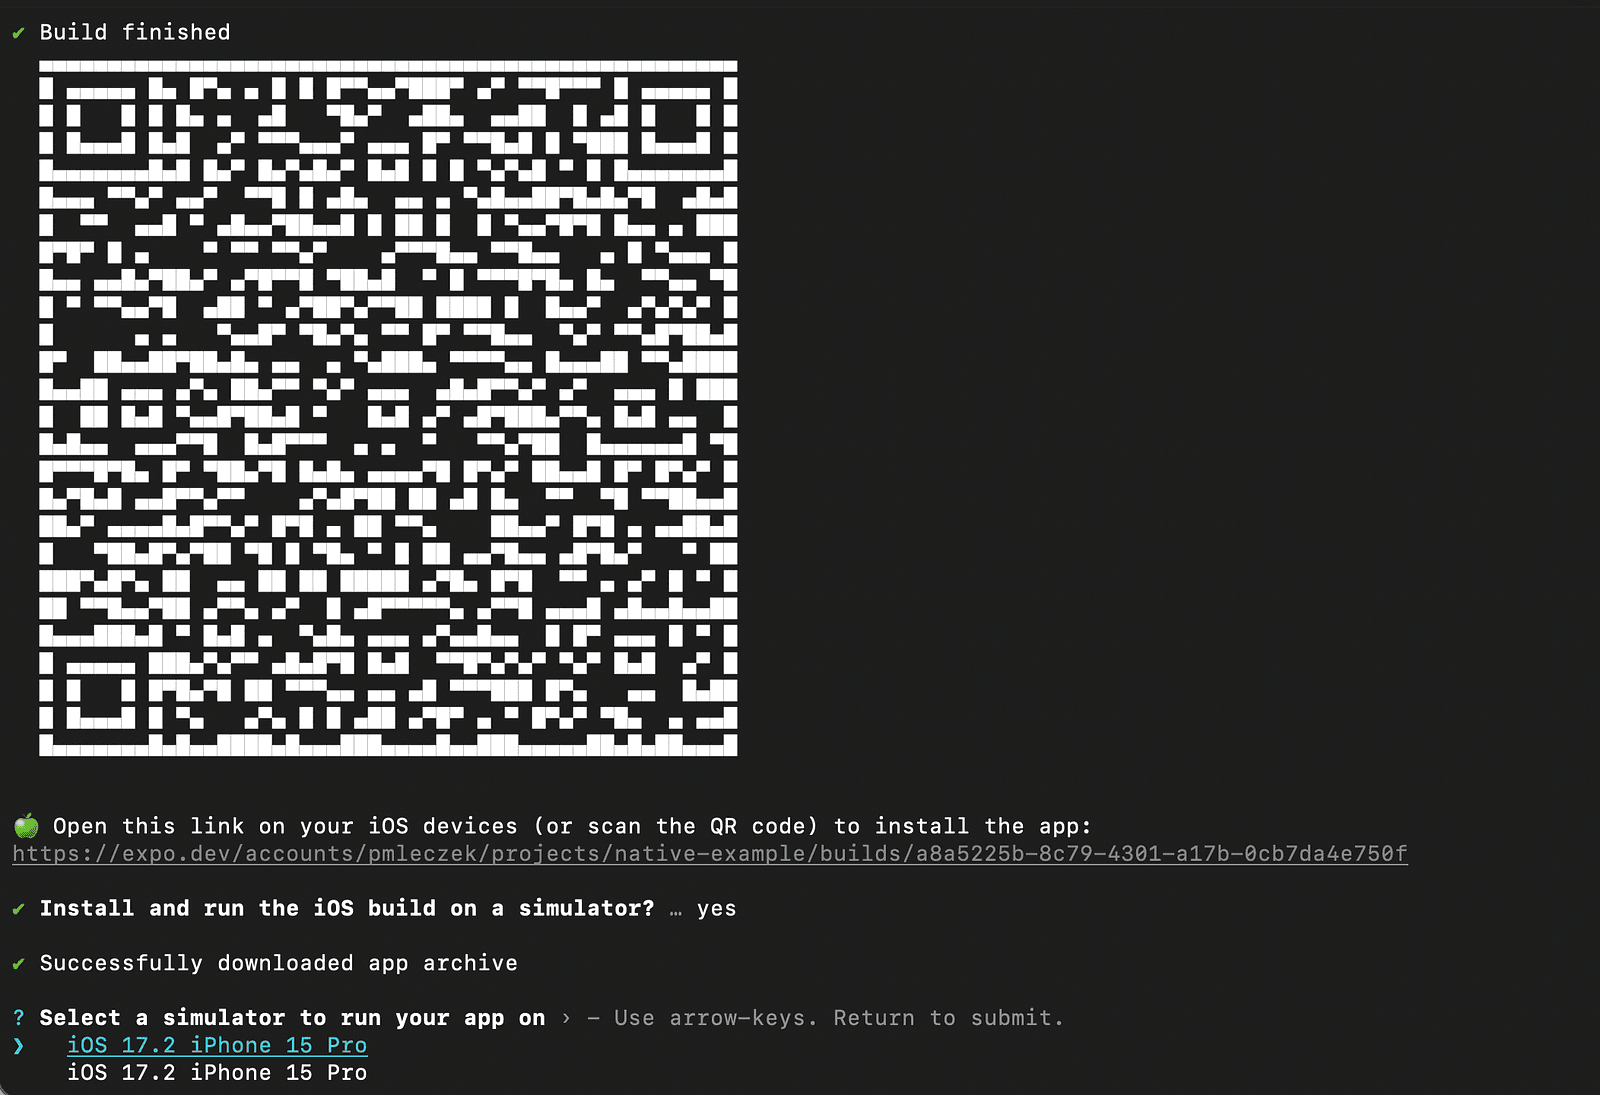
If the build succeeds, we’ll see a QR code and a link to install the app on our device. We’ll also be prompted to confirm whether we want to install the built app.
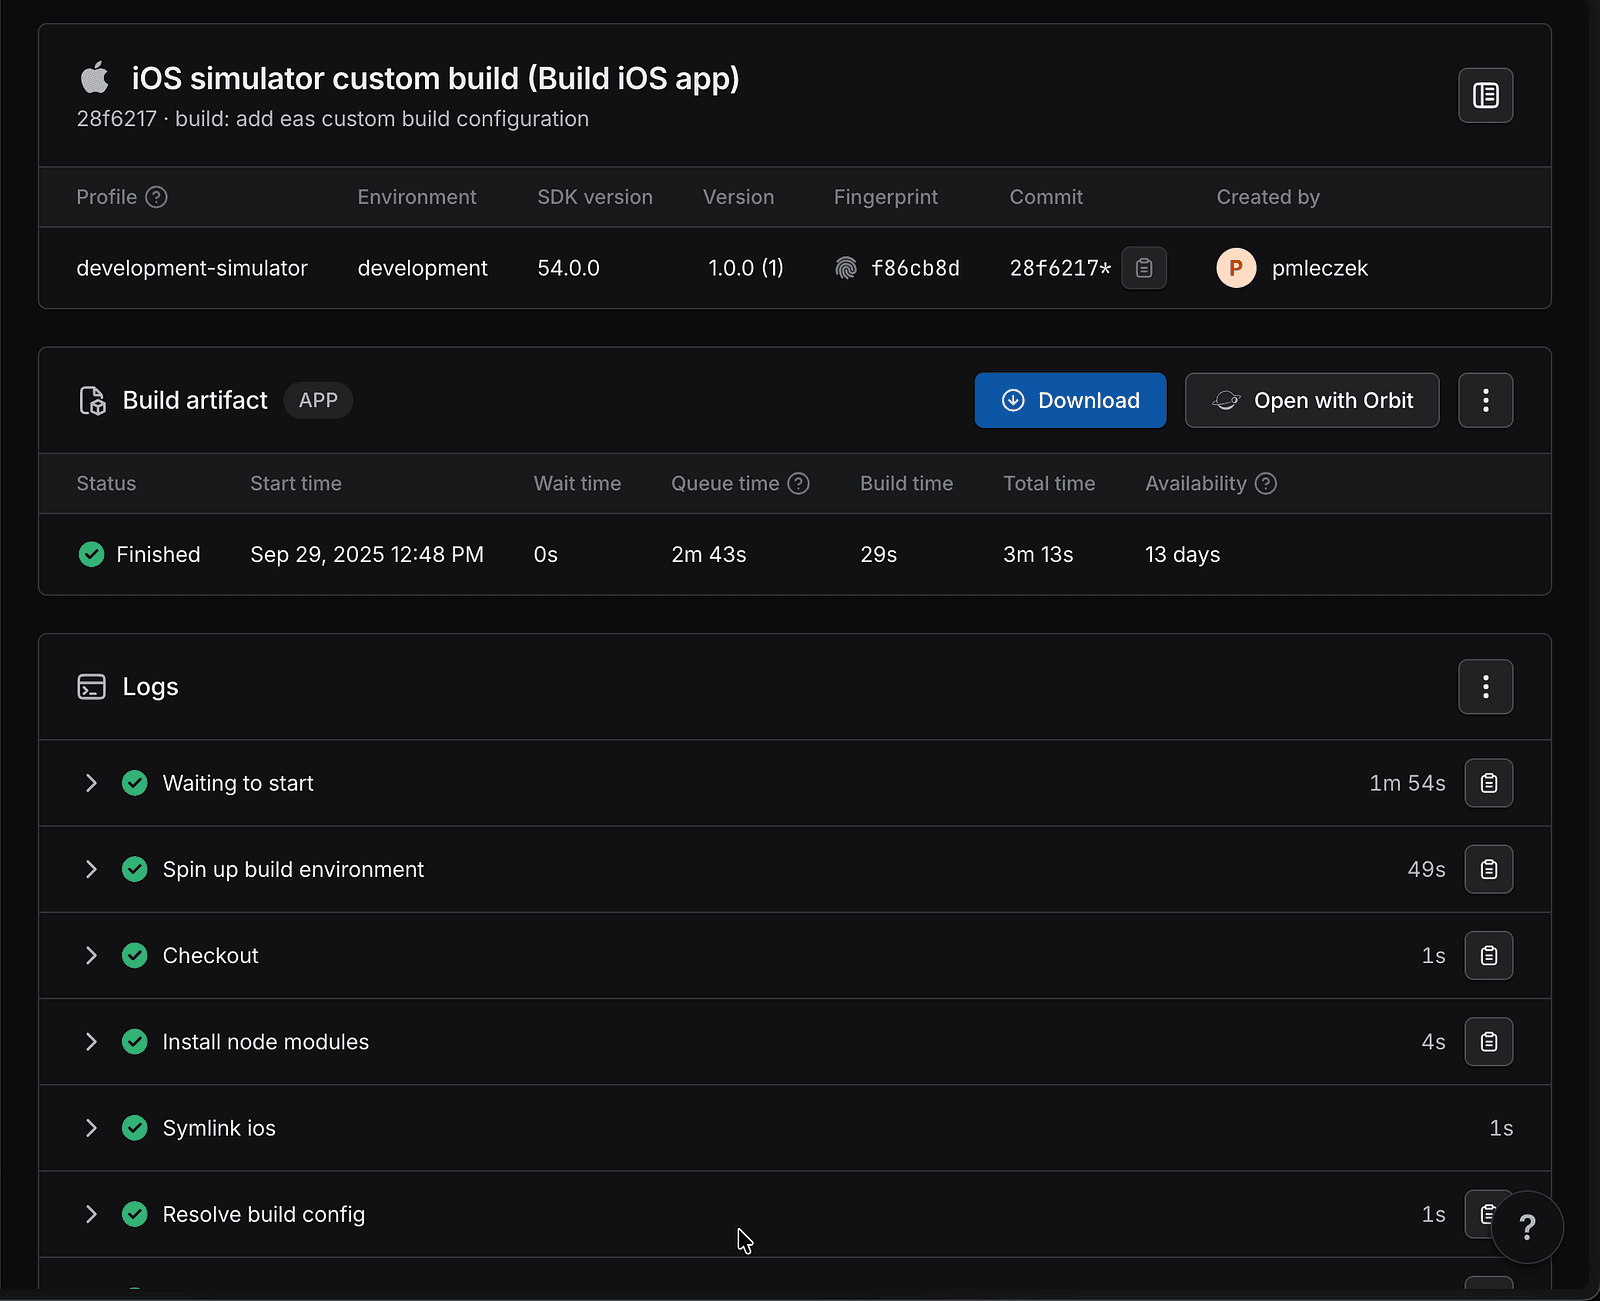
The built app can also be downloaded from the build page on expo.dev:

Note: If you’re using Git for version control you can ensure that your .gitignore file contains the following entry, so that the EAS build artifacts aren’t accidentally added:
# EAS build artifacts
build-*.tar.gz
Step 5: Adding EAS workflows
Now as our custom build configuration is ready, we can create an EAS workflow that will use it. EAS workflows is a CI/CD service which enables you to define development and release processes, such as creating preview builds for commits or automatically submitting to the app stores. More information about EAS workflows can be found here: https://docs.expo.dev/eas/workflows/get-started/.
Workflows, similarly to custom builds, are defined by .yml files. Let’s start by creating new subdirectory workflows adjacent to build in the .eas folder, and let’s add a new file create-ios-build.yml.
Let’s start by giving our workflow a meaningful name:
name: Create iOS build (simulator)Now, we’ll define the job that will use the build profile we have created in the previous section. Let’s add a new job entry with the following configuration:
name: Create iOS build (simulator)

jobs:
  build_ios_simulator:
    name: Build for iOS simulator (development)
    type: build
    params:
      platform: ios
      profile: development-simulator
Let’s quickly go over the properties of our job:
- Top level property (
build_ios_simulator) defines the ID of our job. Its value should be unique within the workflow name— Specifies the human-readable name of our workflowtype— Specifies the job type, in this casebuildwill execute the EAS buildparams— Allows passing build parameters to the job
In this case we’re passing two parameters:
platform— Eitherandroidorios, which is a required parameter and specifies the platform similarly to when-pis passed toeas buildprodile— Allows us to use thedevelopment-simulatorprofile we’ve defined previously, ensuring correct steps are executed, according to our custom build configuration
Let’s start the workflow we just created by running the following command:
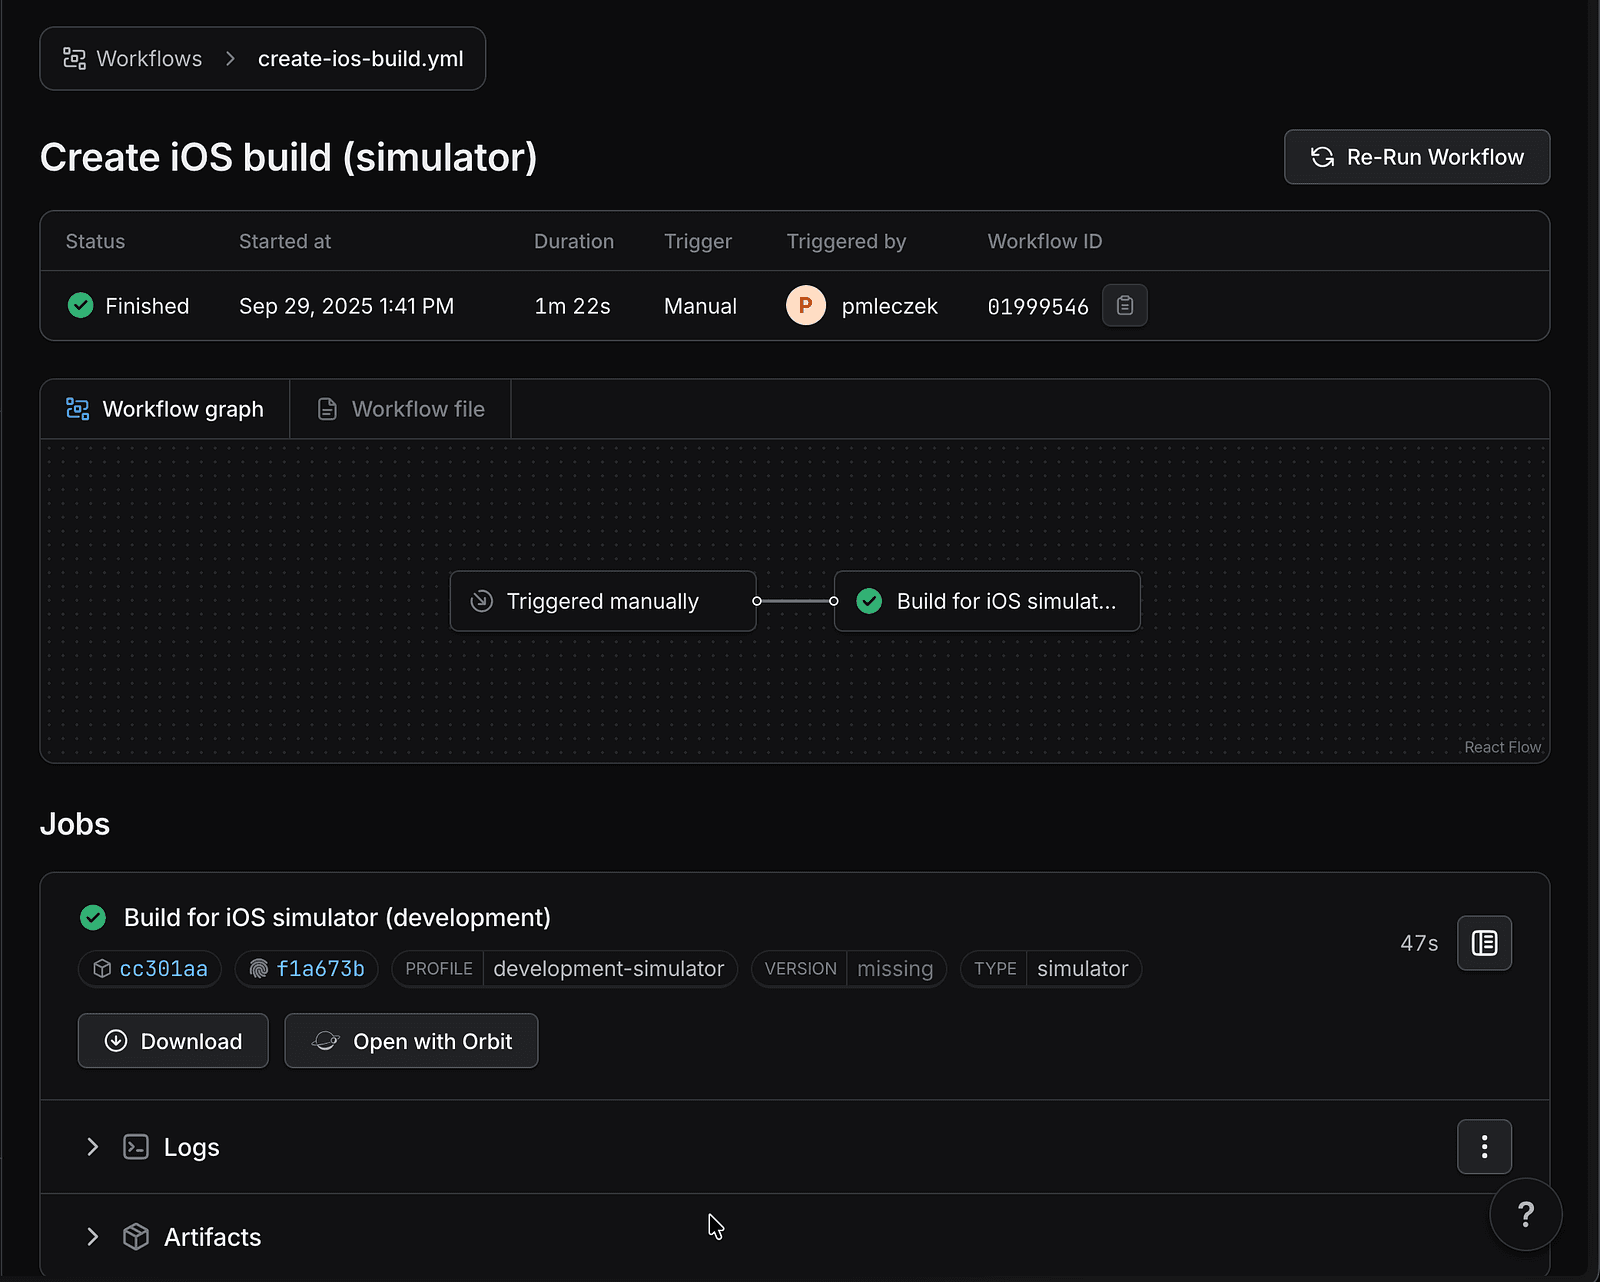
eas workflow:run create-ios-build.ymlEAS CLI will automatically upload the files of our project to the cloud and execute the workflow:

We can see the progress of our workflow using the link from the CLI output or by navigating to:
https://expo.dev/accounts/<username>/projects/<project-slug>/workflows
There, we can see the workflow logs and access the build artifacts like the built app and XCode build logs.
The workflow we have defined is very simple and only consists of one build step, but it can be easily extended with triggers (e.g. a CRON-based schedule, push to a branch or pull request) and additional actions like sending a slack message, publishing comments on GitHub or running Maestro tests. Full reference of available triggers, actions and the jobs syntax can be found here: https://docs.expo.dev/eas/workflows/syntax/.
Conclusion
Thanks to its flexibility and customization possibilities, EAS builds and workflows can be set up in a fully-native iOS project in just a few steps.
The full code for this tutorial can be found here: https://github.com/pmleczek/eas-native-ios-app-example, so be sure to check it out and give it a try in your project. And if you need help along the way, you can always reach out to us at [email protected]. As the top contributing group to the Expo ecosystem, we’re more than ready to help you!
We’re Software Mansion: multimedia experts, AI explorers, React Native core contributors, community builders, and software development consultants.