Build and publish multiple RN apps from the same codebase.
 Aleksander Mikucki•Jun 24, 2020•4 min read
Build and publish multiple RN apps from the same codebase. (part I)

Introduction & How to select features based on an application identifier and react context (part I).
This is the first part of our tutorial on building Branded Apps from a single codebase with React Native. Follow this tutorial to learn how to structure the code, manage flavored apps configuration, setup build and CI pipeline and more. We will focus on the project setup that allows for customizing things like assets or feature set based on the app flavor.
The goal
You may find this tutorial helpful if you need to build multiple similar apps that share features, but have a different branding, appearance and names. Apps are based on the same, single React Native codebase, but various features can be made enabled in some of them and disabled in others.
We aim for this setup to require as little “manual” labor as possible and automate most of the build process when adding new brands or publishing updates to the existing apps.
This is a good solution for stuff like SaaS white label products where you tailor a single application for multiple companies.
Disclaimer
Getting this working required a lot of creative thinking of various difficulties and weirdness. There are many different ways how the presented problems can be solved. We researched many options and believe that the ones presented here are among the cleanest. However, we are always open to comments and to learn from your experiences. If you know of better ways to resolve some of the steps here, please let us know in the comments.
Let’s get started! 😅.
The JavaScript 🌟
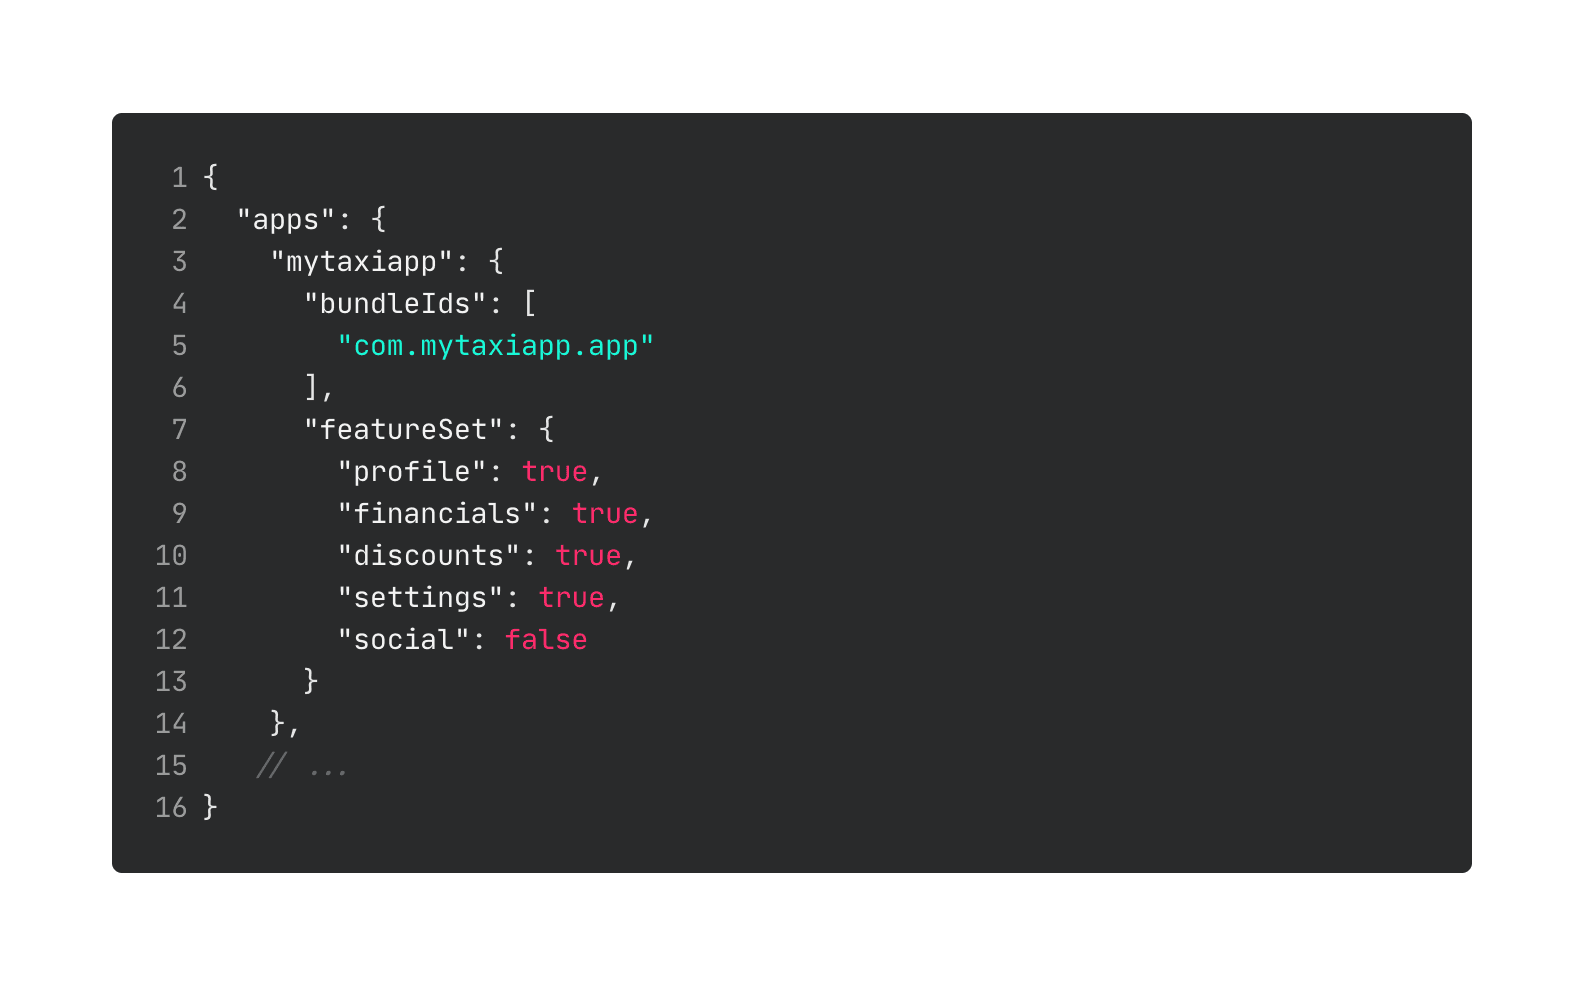
In our approach we store the configuration of each app flavor in a configuration file. This includes things like the app bundle ID used for publishing, but also details like theming and feature flags.
The list of apps with their feature set (a map of features that are accessible in the app) is stored in a JSON configuration file at the root of the project.
To detect the currently running app, we compare the list of bundleIds to the bundleId returned by react native device info. We then provide the current app config in a react context, with additional hooks to make this easy to use in other places of the app.
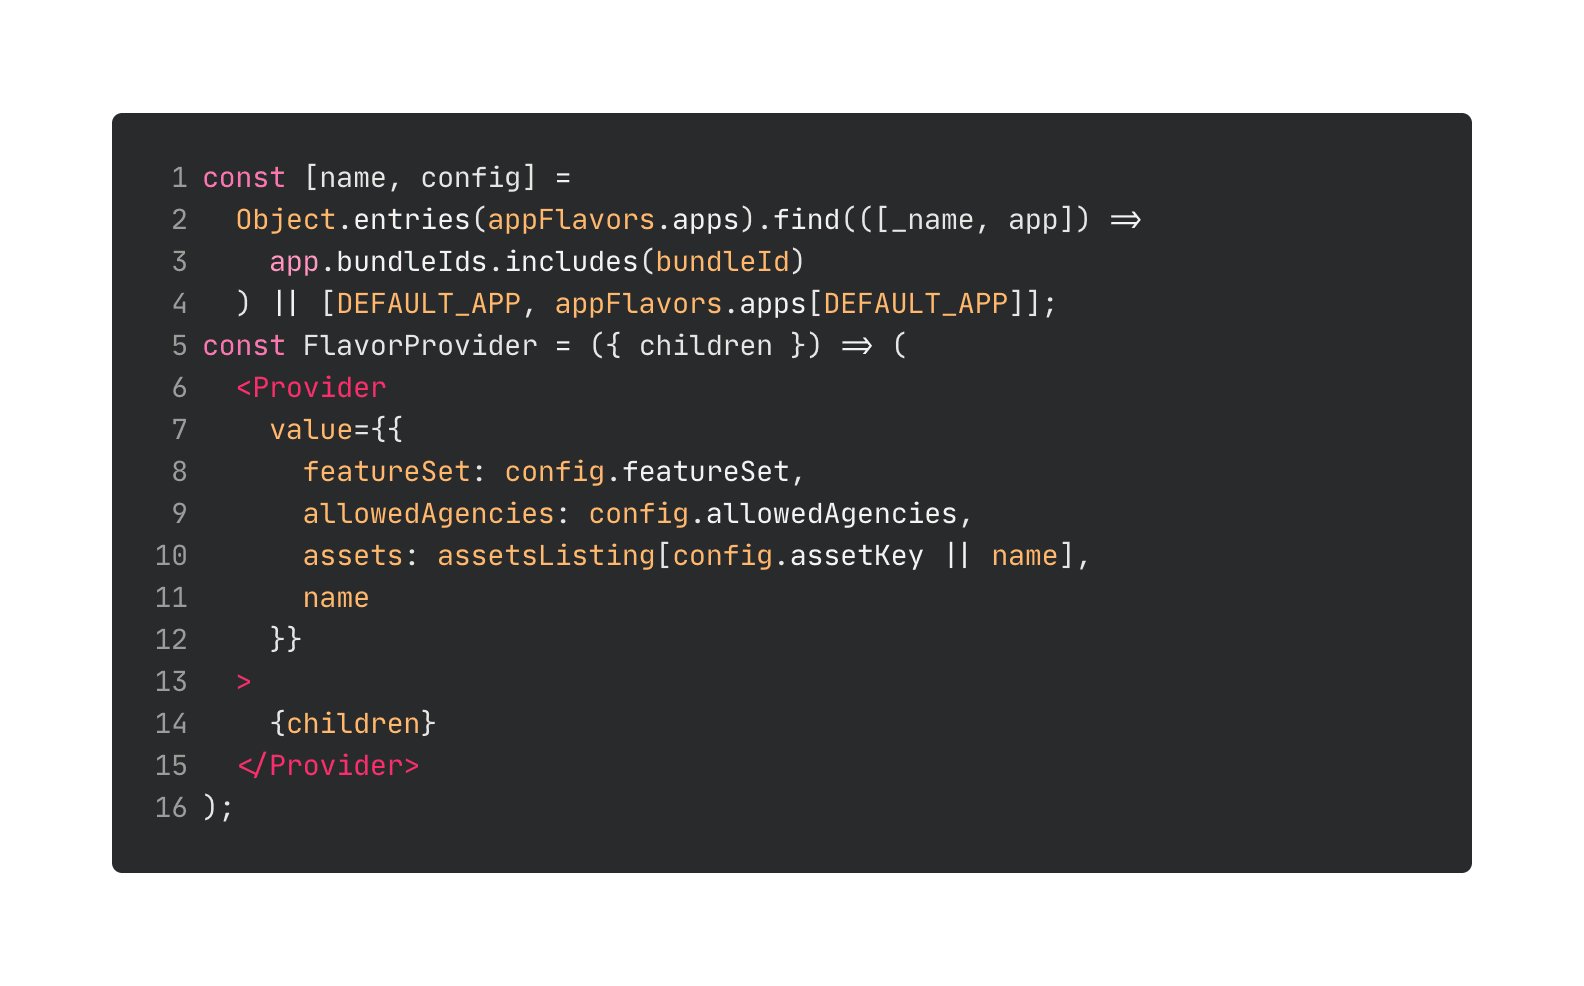
We then use the `featureSet` to conditionally hide screens in the main navigator of the app (and can also do checks against it when needed). We can also use this to conditionally show other components or change the behavior in any other way.
If you want to use this approach in a managed expo project (one where the app is built on expo servers), you will not be able to use react-native-device-info to get the bundleId of the current app. In this case, you will need to embed this information in the expo release channel string. This forces you to create at least one release channel for each flavor of the branded app.
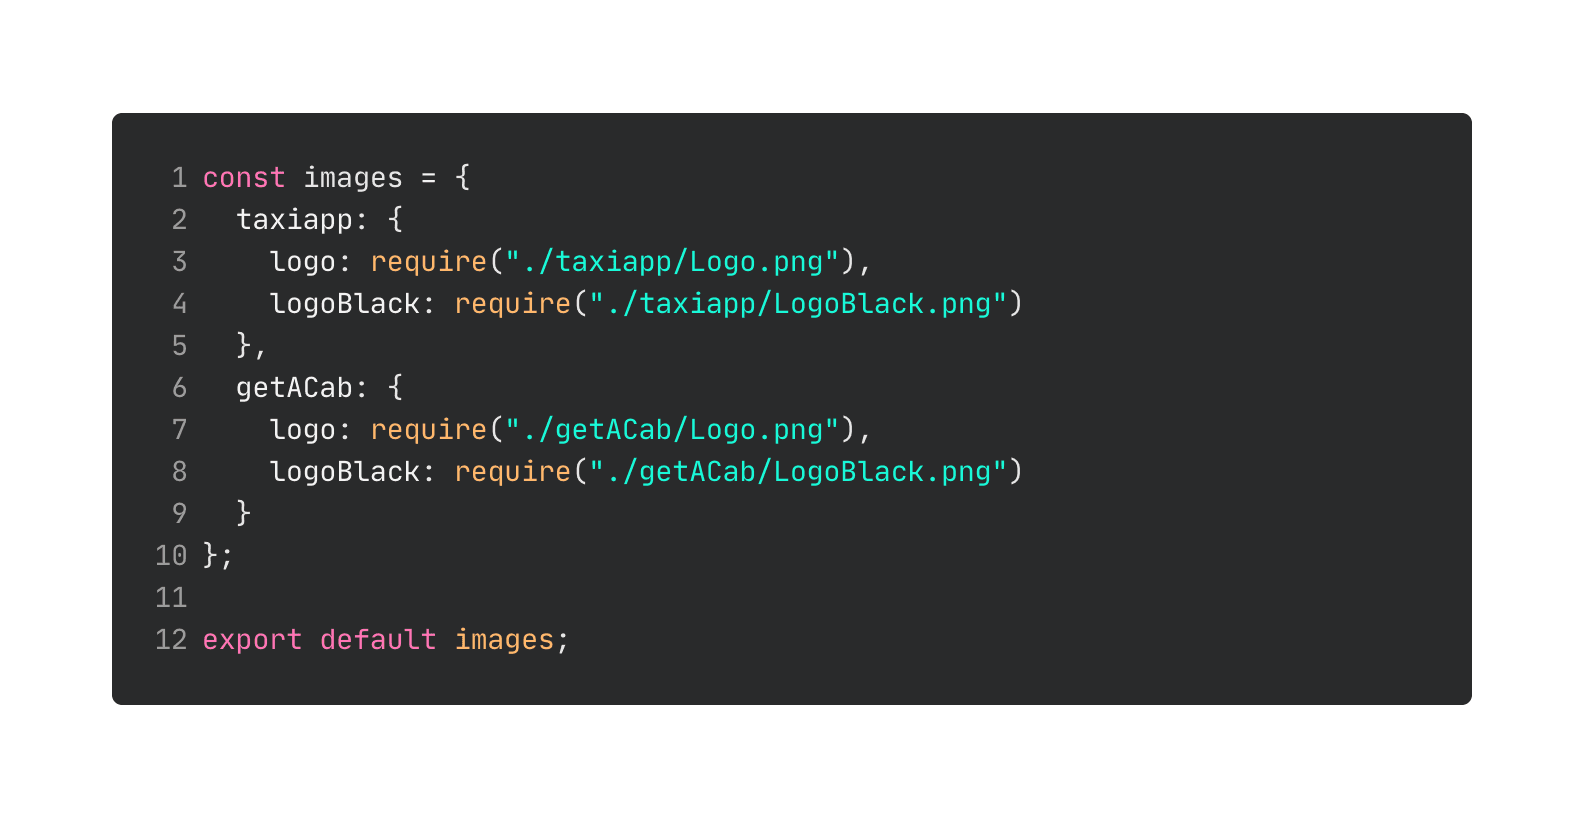
The assets 🖼
To display different logos based on the current app bundleId, we create an assetListing.js file, that imports all the assets for each branded version of the app. As we didn’t have many assets, this was the easiest solution for our usecase. If you have multiple large images, it would be better to look into dynamic imports or hosting them online.
The theme 🎨
For theming we recommend using some off-the-shelf solution. In our case, we used react-native-ui-kitten that played really well with our JS config based approach. We have a general theme file and app-specific snippets that allow us to set different colors, fonts, margins or any other theme variables for each of the branded apps.

We learned how to structure your application code to prepare it for generating many different branded Apps. In the next parts of this tutorial series we will learn how to manage build configuration and publishing pipeline.
➡️ Part II: Configure your android studio and Xcode project.
Wow, you’ve read this far, thank you!
If you have any ideas, improvements, questions, or issues reach out to me on twitter @aleqsio. Hope you’ll have a great day 👋.